How to Login #
- Click the Genesys Icon on your desktop or go to https://apps.use2.us-gov-pure.cloud/ in Chrome if you do not have the desktop icon.
-
- Supervisors must put in an OHD ticket to have the Genesys icon loaded to your computer.
- Once you get the icon, you should take calls out of that instead of through your internet browser.
-
- At the select region page, change your region to FedRAMP.

- When you get to the login page, click more login options.
- Enter SOMODSSFSDFR in the box and click Next.
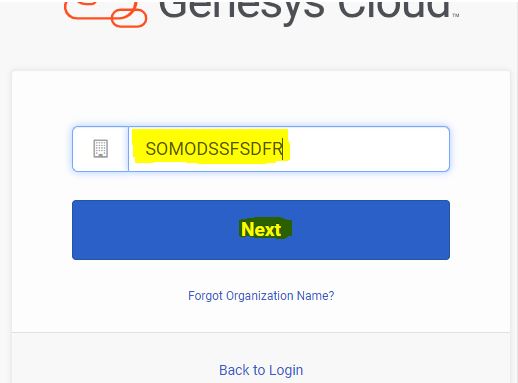
- Then click okta.

- After the initial login process has been completed, future logins should only require clicking on OKTA.
Note: There may be times, such as clearing browser or computer updates, when the whole process will need to be repeated to login.
How to Answer and End Incoming Interactions #
On Queue
- Click the
 toggle on the upper right of your screen to go “On-Queue”. This will put you into Ready to receive incoming interactions. Make sure you have all necessary systems up and logged into before going On-Queue.
-
- The Interactions panel opens. Incoming interactions appear in the Active Interactions list.
Answer
- When a new interaction is sent to you, click Answer.
-

- If you decline a call or do not answer, Genesys will change your status to Not Responding. You will need to go off-queue and then back on-queue again to receive more interactions.
-
End
- Click End Call
 to disconnect when ready
Wrap Up
- Stay in after call work/wrap up status while making notes or finishing processing.
-
- Wrap up/after call work will have a time limit of 10 minutes. Once the 10 minutes is reached staff will be automatically put back on queue.
-
- Choose the most appropriate wrap up code based on the bulk of the conversation had with the caller.
-
- You cannot enter multiple wrap up codes if you discussed multiple cases.
- You must choose a wrap up code for every interaction you answer.
- Stay in After Call/Wrap Up status until you are ready to move on to the next interaction or activity (including calling customers back).
-
- If your next activity is another call, click Done. The system will send you another call. The system will not give you another call until you click Done.
- If you need to get off the phones (go to break, meeting, log out, etc.) click your On Queue toggle button to go Off-Queue, then click Done.
If you need to call a customer back:
- Choose a Wrap up code
- Go Off-Queue
- Click Done
-
- It is very important, you finish the wrap up for the original call before calling the customer back.
-
- Change status to Busy-Customer Call Back
- Follow Make an outbound call instructions
Stop Taking Calls
- Choose a Wrap up code
- Go Off-Queue
- Click Done on the Wrap Up Code
- Change your status or log out
I Forgot To Choose A Wrap Up Code Before I Went Into Another Status. How Can I Fix It?
- If you forgot to choose a wrap up code from a call before changing your status or logging off, you will have a red indicator on the Interactions icon

- Click on the above icon to see your open interaction shown below.

- From there you will have the wrap up code icon on the right shown below. Click on that icon to choose your wrap up code and click done.

How Does The System Know To Stop/Start Sending Me Calls?
- When you click Done on your wrap up code, the system will send you another call.
-
- There is a 10 minute time limit on after call work/wrap up work time. Once the 10 minutes has been reached the system will automatically put you back on queue.
-
- If you need to stop taking calls, go off-queue before you click Done. Going off queue lets the system know you are not ready to take another call.
What Status Should I Be In? #
In order to take calls, you must go “On Queue” if you are not taking call, please follow the below directive:
For BPTs:
Everyone will remain in Available status unless one of the following is true:
-
- Sup Approved Time
- CCI Correction
- Email/Memo Time
- Customer Call Back
- Vacation/Sick Leave/Flex Day
- Lunch/Break
- Meeting/Training/Engage
- Technical Issues
For Supervisors:
All supervisors will remain in Available status unless one of the following is true:
-
- Meeting/Training/Engage
- Lunch/Break
- Multi-Supervisor Office (if there are 4 supervisors, all 4 supervisors should not be blitzing, only a few to assist staff)
- Vacation/Sick Leave
- Technical Issues
- Coaching/Assisting staff
Staff Testing Cases:
The status will be Busy/Other Sup Approved
How Do I Know Which Queue My Call Is Coming From? #
Supervisors may need to move staff to different queues depending on business need. When staff answer a call, the interactions panel will show which queue the phone call came from:

Resizing Interactions Panel #
- To expand the interaction, click the two arrows at the top pointing in different directions (highlighted in yellow below).

- If you no longer want the section expanded, click the arrows pointing at each other (highlighted in yellow below).

- To resize the screen without making interaction full screen mode. Click the 3 dots in the middle of the page and select the view you want to use (highlighted in yellow below).

Making an Outbound Call #
- Be sure to finish all wrap up activities from any other calls first.
- Change your status to “Busy-Customer Call Back”
- To open the Calls panel, click Calls.

-
- Click Dialpad.

- Start typing a name or phone number in the Enter Names and Numbers field; Genesys Cloud displays contacts that match the entered characters. Select a contact from the list, or continue typing the full number. Press Enter.
- To start the call, click the Call button or press Enter again. 

- To end the call, click the End Call button. 

- Click Dialpad.
-
- Do not make an outbound call from interactions panel.
Language Line Calls
-
- From the Interactions panel, click and select the Consult Icon for Consult.

-
- Type Language Link in the field. The contact will appear under External Contacts.

-
- Click on the Consult button.
-
- Both calls will show on your screen.

-
- You will open the dial pad to select prompts.

-
- To add the customer back to the call, click the red pause button. When both pause buttons are blue, you are connected to all callers.

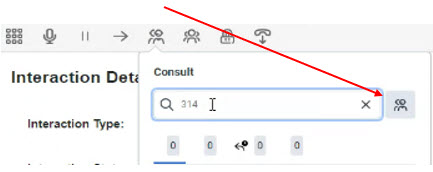
3-Way Calls (Contacting Employer)
-
- From the Interactions panel, click and select the Consult Icon for Consult.

-
- Type in Phone Number and press Enter.
- Click on the Consult button.

-
- Both calls will show on your screen. The customer will be on hold.

-
- To add the customer back to the call, click the red pause button. When both pause buttons are blue, you are connected to all callers.
Consulting OFF Queue On Outbound Calls
When a worker has to call a customer back and needs to either call the language line or call an employer as well, these instructions should be followed:
-
- First, call the customer. Once you have them on the line you will navigate to the Calls panel, click and select the down pointing arrow and click Add Participant

-
- Type in the phone number and click the green phone icon

-
- If one of the calls needs to be disconnected but not the other one, hover over the icon of the call that needs to be disconnected and click disconnect.

How to Transfer Call #
To perform a transfer after receiving a call:
-
- From the Interactions panel, click and select Transfer.

-
- Type the phone number or tier name in the search field
- For transfers to another queue/tier, open up External Contacts from your search results and choose the queue/tier from there.
- Do not choose anything under the Queues drop down. If you do, it will cause the call to get stuck in the queue and not get answered.

-
- Be sure to check if the queue is full before transferring. See How Do I Know if the Queue Is Full section.
- If the queue is not full, click Transfer.

To perform a transfer after making an Outbound call:
-
- From the Calls panel, click Expand and select Transfer.

-
- Type the phone number or tier name in the search field
- For transfers to another queue/tier, open up External Contacts from your search results and choose the queue/tier from there.

-
-
-
- Do not choose anything under the Queues drop down. If you do, it will cause the call to get stuck in the queue and not get answered.
-
-
-
- Be sure to check if the queue is full before transferring. See How Do I Know if the Queue Is Full section.
- If the queue is not full, click Blind.

How to Transfer Chat #
From the Active Interactions list, select the chat you want to transfer.
- Click the Transfer icon

- Type the user or queue that you want to transfer the chat to.
- Select the user from the suggestions displayed.
- Click Transfer.
How Do I Know If The Queue Is Full? #
CSC Dashboard
You can check the CSC Dashboard for the current wait time. Go to Performance, Workspace and click on a + to open a new tab. From the column on the left choose Dashboards. In the Find Dashboards search bar, search for “CSC Dashboard”


Click the Yellow Star at the top to favorite this dashboard

When you try to access this dashboard again, you can filter your view by Favorites to find it again instead of searching for it.

If there are at least 50 calls in the queue and the wait time for the queue is longer than the number of hours left in the business day + 2 hours for Tier 1 or 3 hours for Tier 3, the queue is full and the call will not go through. If there is less than 50 calls in queue, any call will get in regardless of time of day up until 6:00pm.
-
- Tier 1 Example: Current time is 2:30 pm. The wait time is 3 hours. 2:30 pm + 3 hours wait time + 2 hours padding = 7:30 pm. The call will not get into the queue.
- Tier 1 Example: Current time is 1:30 pm. The wait time is 3 hours. 1:30 pm + 3 hours wait time + 2 hours padding = 6:30 pm. The call will not get into the queue.
- Tier 1 Example: Current time is 9:00 am. The wait time is 3 hours. 9:00 am + 3 hours wait time + 2 hours padding = 2:00 pm. The call CAN get through into the queue.
- Tier 3 Example: Current time is 2:30 pm. The wait time is 3 hours. 2:30 pm + 3 hours wait time + 3 hours padding = 8:30 pm. The call will not get into the queue
- Tier 3 Example: Current time is 9:00 am. The wait time is 3 hours. 9:00 am + 3 hours wait time + 3 hours padding = 3:00 pm. The call CAN get into the queue.
- Tier 3 Example: Current time is 1:30 pm. The wait time is 3 hours. 1:30 pm + 3 hours wait time + 3 hours padding = 7:30 pm. The call will not get into the queue
When customers reach the call center when the queue is full (known as overflow or deflection) a message is played asking them to call back another time and the call is disconnected. Staff should not transfer calls to another tier if it is full. See the Transferring Between Tiers SOP for more information on transferring to other tiers.
Do not try to schedule a call back in Genesys for Genesys to call the customer back at a specified time. This causes errors in daily reports and when/if the system calls the customer back it will not be from the correct queue. This will also cause the call to have a very low call priority in the system and the call could get stuck in the queue instead of being answered.
Why Do We Have Padding?
Padding allows calls we know we can get to before the end of the day to get into the queue and not allow calls we know we can’t get to before the end of the day to get into the queue. By doing this, individuals do not wait 6+ hours only to not have their call answered because the end of the day is reached.
How to Place a Call on Hold/Mute #
From the current call, select the action you want to perform.
| Mute | |
| Hold |
How to View Interactions #
- Click Menu > Interactions.
- To view the interaction log, click Interaction Log on an interaction.

Who Do I Contact When I have Issues? #
For any issues with your Genesys, please email fsd.im.genesysteam@dss.mo.gov. DO NOT submit an ITSD ticket unless specifically told to by the Genesys Team.